> ## Documentation Index
> Fetch the complete documentation index at: https://ikun.mintlify.site/llms.txt
> Use this file to discover all available pages before exploring further.
# CI/CD
Agno 模板预配置了 [Github Actions](https://docs.github.com/en/actions) 用于 CI/CD。我们可以
1. [在每次 PR 时进行测试和验证](#test-and-validate-on-every-pr)
2. [通过 Github Releases 构建 Docker 镜像](#build-docker-images-with-github-releases)
3. [通过 Github Releases 构建 ECR 镜像](#build-ecr-images-with-github-releases)
## 在每次 PR 时进行测试和验证
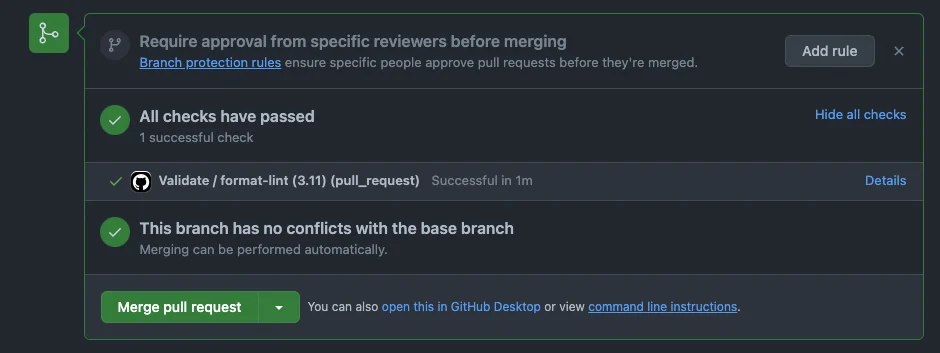
每当针对 `main` 分支打开 PR 时,都会运行一个验证脚本,以确保:
1. 更改已使用 ruff 格式化
2. 所有单元测试均通过
3. 更改没有任何类型或 linting 错误。
请查看 `.github/workflows/validate.yml` 文件了解更多信息。
 ## 通过 Github Releases 构建 Docker 镜像
如果您正在使用 [Dockerhub](https://hub.docker.com/) 作为镜像仓库,可以通过 Github Release 构建和推送镜像。此操作定义在 `.github/workflows/docker-images.yml` 文件中。
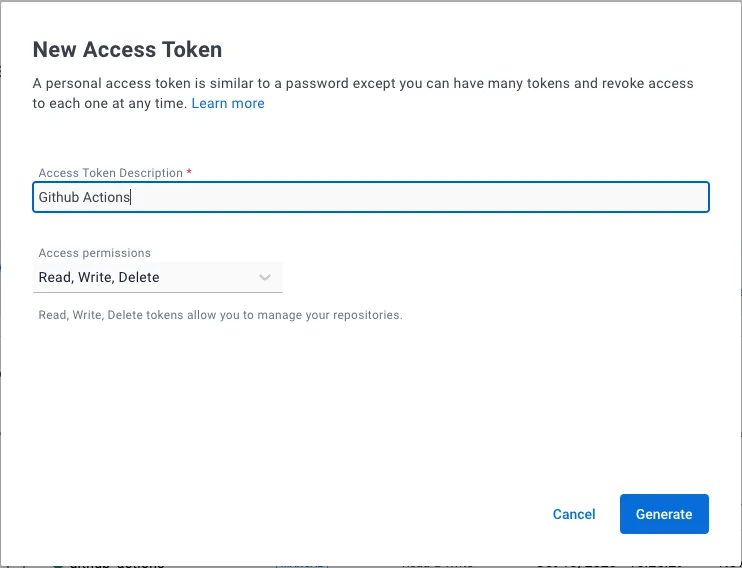
1. 为 Github Actions 创建 [Docker 访问令牌](https://hub.docker.com/settings/security)
## 通过 Github Releases 构建 Docker 镜像
如果您正在使用 [Dockerhub](https://hub.docker.com/) 作为镜像仓库,可以通过 Github Release 构建和推送镜像。此操作定义在 `.github/workflows/docker-images.yml` 文件中。
1. 为 Github Actions 创建 [Docker 访问令牌](https://hub.docker.com/settings/security)
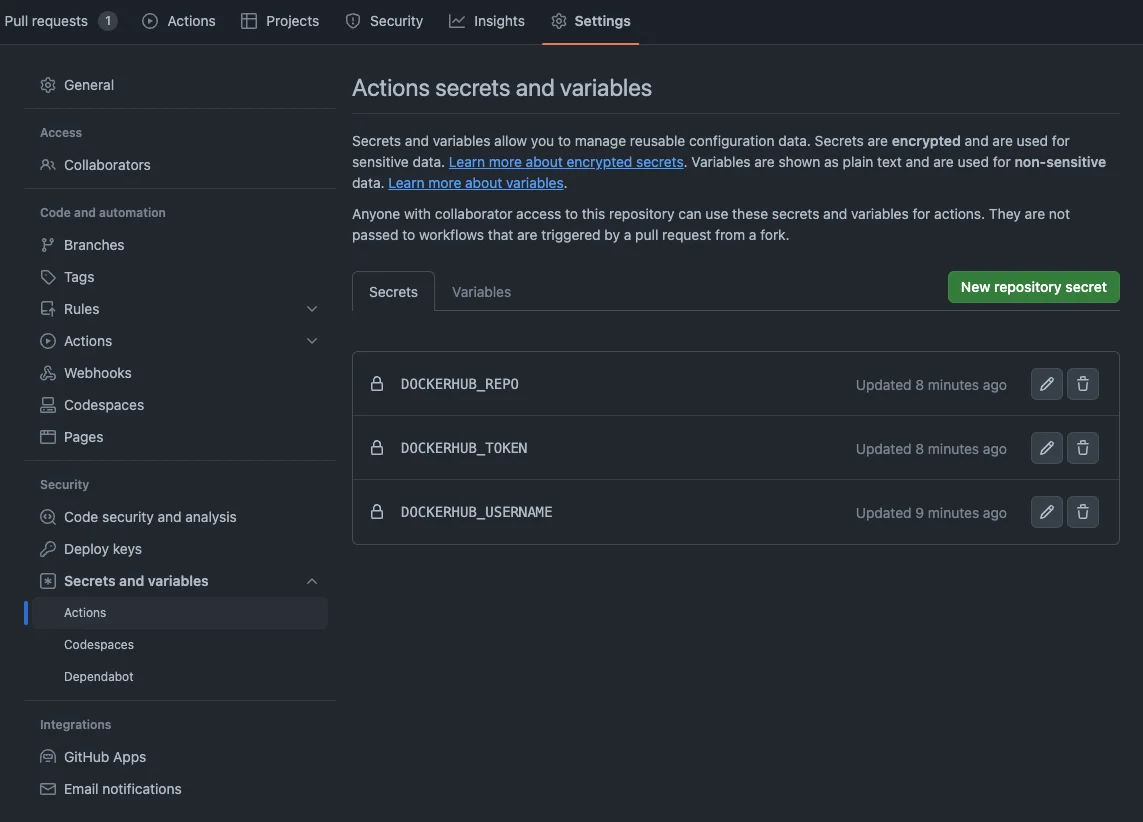
 2. 在您的 github 代码库中创建 secret 变量 `DOCKERHUB_REPO`、`DOCKERHUB_TOKEN` 和 `DOCKERHUB_USERNAME`。这些变量由 `.github/workflows/docker-images.yml` 中的 action 使用。
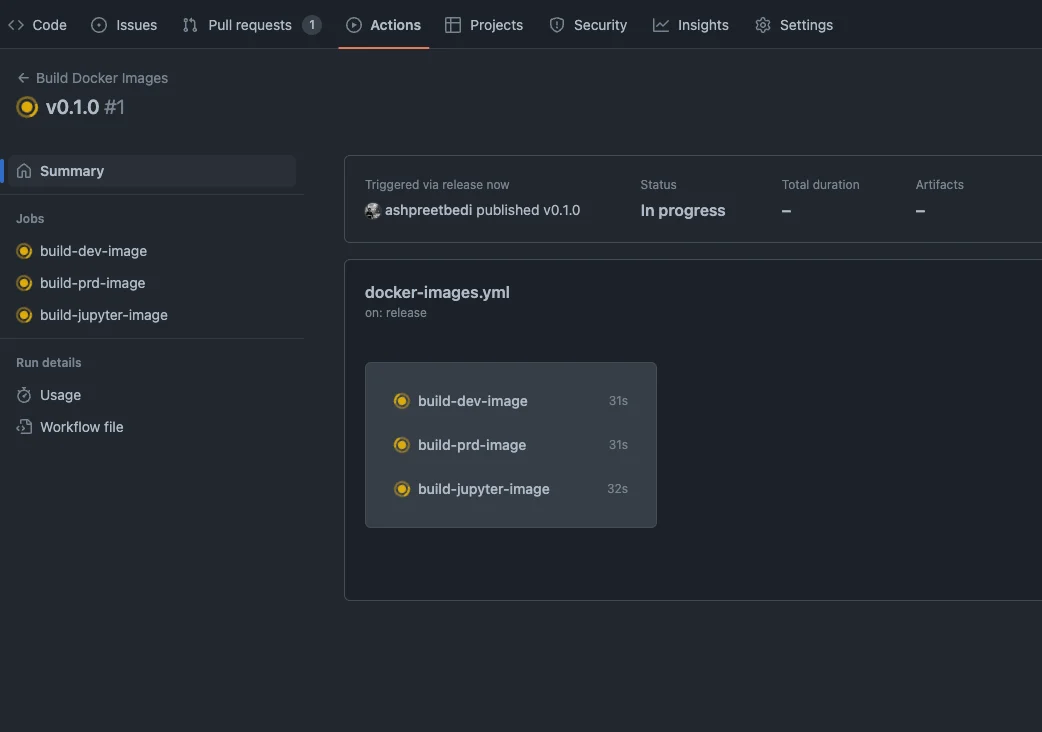
 3. 通过 Github Release 运行工作流
此工作流配置为在创建 release 时运行。使用以下命令创建新 release:
运行前请在 `.github/workflows/docker-images.yml` 文件中确认镜像名称
```bash Mac theme={null}
gh release create v0.1.0 --title "v0.1.0" -n ""
```
```bash Windows theme={null}
gh release create v0.1.0 --title "v0.1.0" -n ""
```
3. 通过 Github Release 运行工作流
此工作流配置为在创建 release 时运行。使用以下命令创建新 release:
运行前请在 `.github/workflows/docker-images.yml` 文件中确认镜像名称
```bash Mac theme={null}
gh release create v0.1.0 --title "v0.1.0" -n ""
```
```bash Windows theme={null}
gh release create v0.1.0 --title "v0.1.0" -n ""
```
 您也可以使用 `gh workflow run` 来运行工作流
## 通过 Github Releases 构建 ECR 镜像
如果您使用 ECR 进行镜像存储,可以通过 Github Release 构建和推送镜像。此操作定义在 `.github/workflows/ecr-images.yml` 文件中,并使用新的 OpenID Connect (OIDC) 方法请求访问令牌,无需使用 IAM 访问密钥。
我们将遵循此 [指南](https://aws.amazon.com/blogs/security/use-iam-roles-to-connect-github-actions-to-actions-in-aws/) 来创建一个将被 github action 使用的 IAM 角色。
1. 打开 IAM 控制台。
2. 在左侧导航菜单中选择 Identity providers。
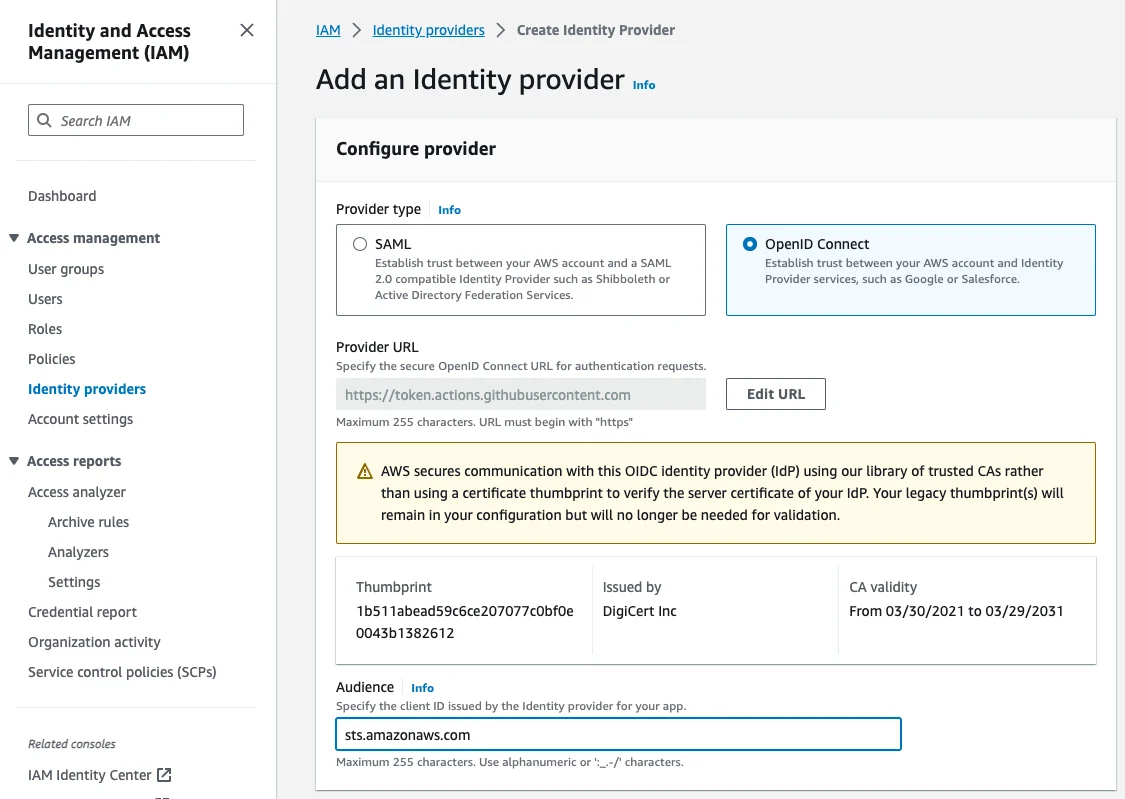
3. 在 Identity providers 窗格中,选择 Add provider。
4. 对于 Provider type,选择 OpenID Connect。
5. 对于 Provider URL,输入 GitHub OIDC IdP 的 URL:[https://token.actions.githubusercontent.com](https://token.actions.githubusercontent.com)
6. 获取指纹以验证服务器证书
7. 对于 Audience,输入 sts.amazonaws.com。
验证信息与下图匹配后,选择 Add provider
您也可以使用 `gh workflow run` 来运行工作流
## 通过 Github Releases 构建 ECR 镜像
如果您使用 ECR 进行镜像存储,可以通过 Github Release 构建和推送镜像。此操作定义在 `.github/workflows/ecr-images.yml` 文件中,并使用新的 OpenID Connect (OIDC) 方法请求访问令牌,无需使用 IAM 访问密钥。
我们将遵循此 [指南](https://aws.amazon.com/blogs/security/use-iam-roles-to-connect-github-actions-to-actions-in-aws/) 来创建一个将被 github action 使用的 IAM 角色。
1. 打开 IAM 控制台。
2. 在左侧导航菜单中选择 Identity providers。
3. 在 Identity providers 窗格中,选择 Add provider。
4. 对于 Provider type,选择 OpenID Connect。
5. 对于 Provider URL,输入 GitHub OIDC IdP 的 URL:[https://token.actions.githubusercontent.com](https://token.actions.githubusercontent.com)
6. 获取指纹以验证服务器证书
7. 对于 Audience,输入 sts.amazonaws.com。
验证信息与下图匹配后,选择 Add provider
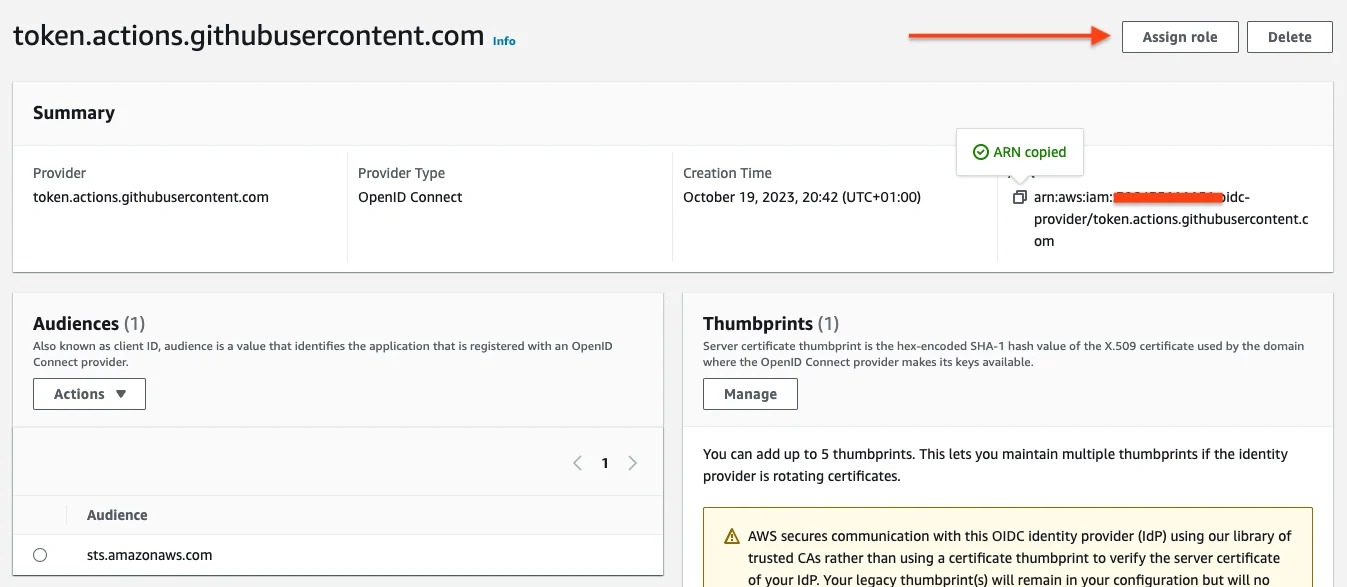
 8. 为提供商分配角色。
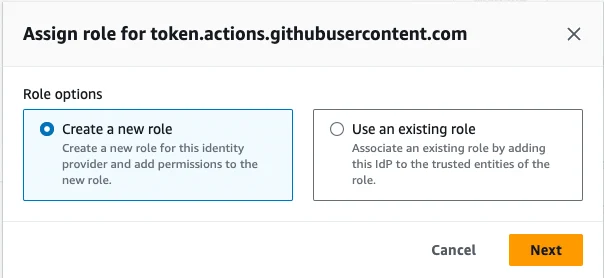
 9. 创建一个新角色。
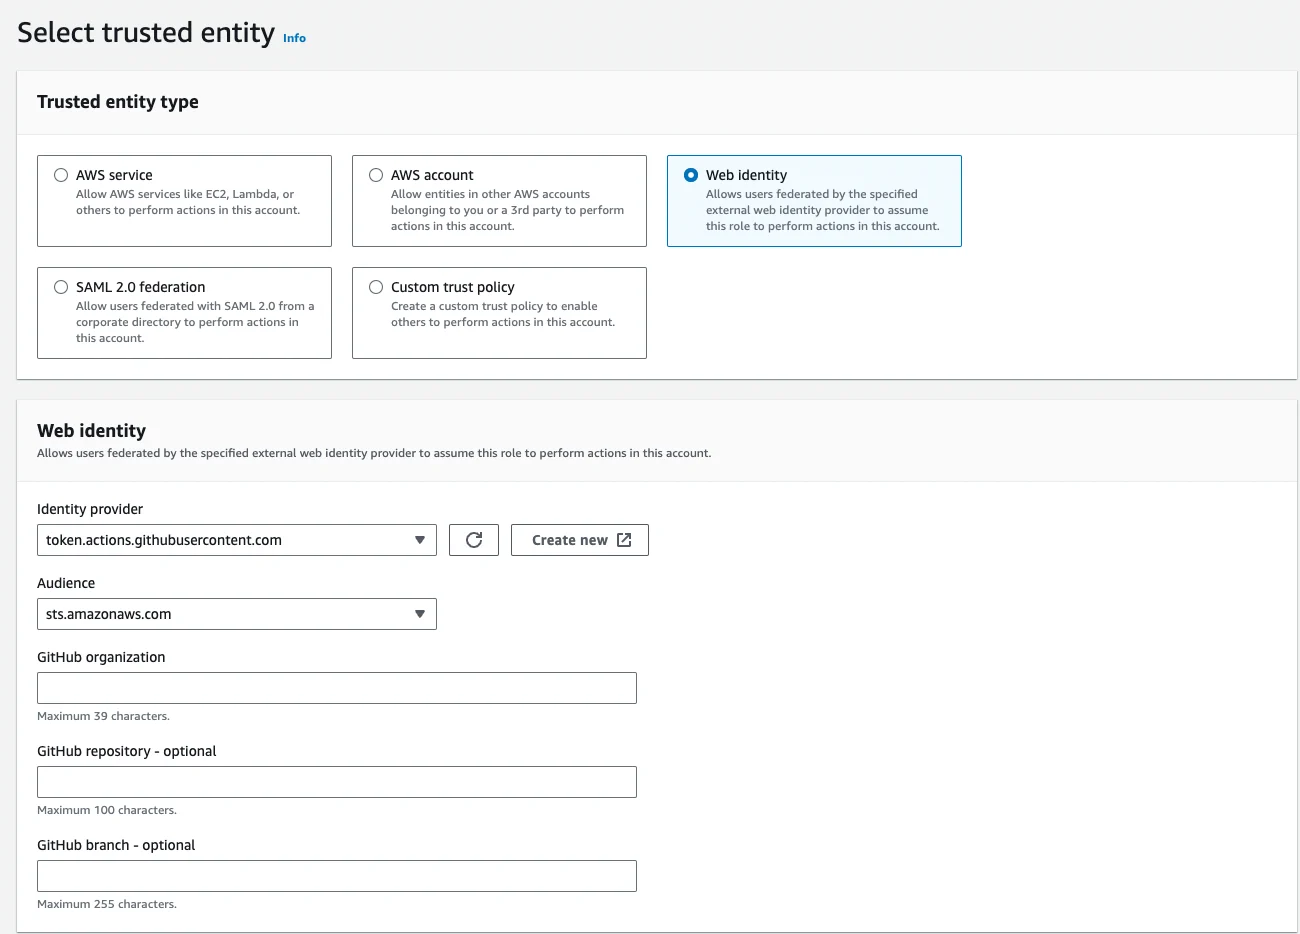
 10. 确认 Web identity 已被选为受信任实体,并且 Identity provider 字段已填充了 IdP。在 Audience 列表中,选择 sts.amazonaws.com,然后选择 Next。
 11. 向此角色添加 `AmazonEC2ContainerRegistryPowerUser` 权限。
12. 以 `GithubActionsRole` 的名称创建角色。
13. 找到 `GithubActionsRole` 并复制其 ARN。
11. 向此角色添加 `AmazonEC2ContainerRegistryPowerUser` 权限。
12. 以 `GithubActionsRole` 的名称创建角色。
13. 找到 `GithubActionsRole` 并复制其 ARN。
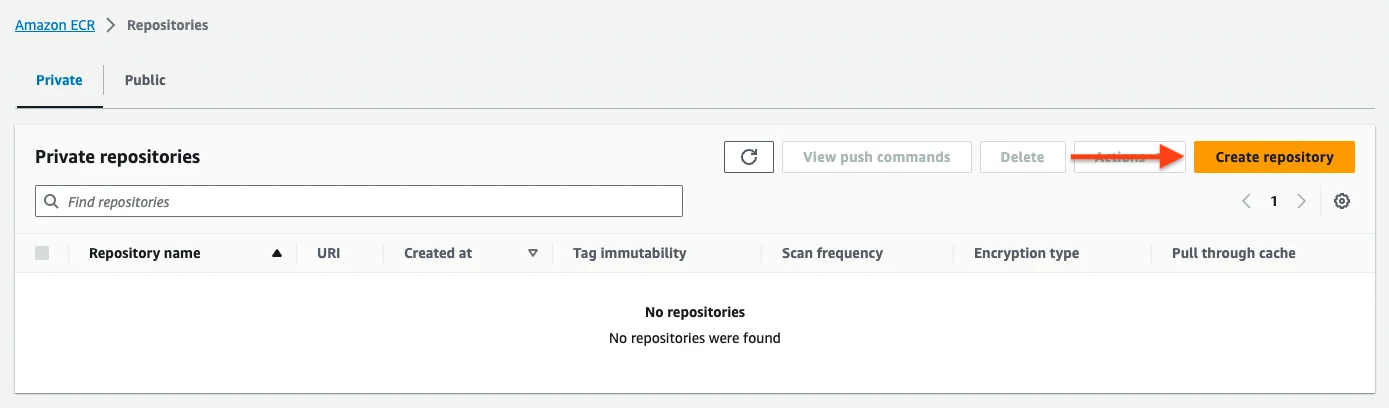
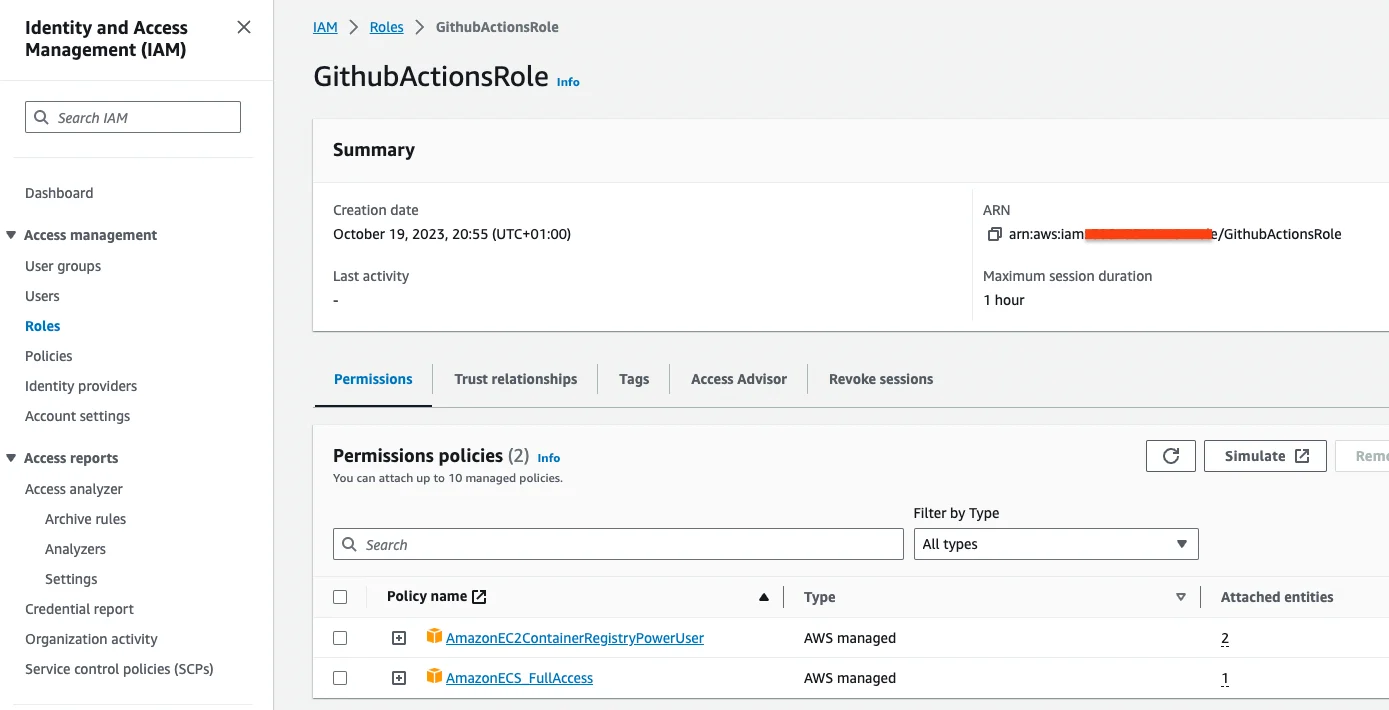 14. 创建 ECR 仓库:`llm` 和 `jupyter-llm`,这些将由工作流构建。
 15. 使用 `GithubActionsRole` ARN 和 ECR 仓库更新工作流。
```yaml .github/workflows/ecr-images.yml theme={null}
name: Build ECR Images
on:
release:
types: [published]
permissions:
# For AWS OIDC Token access as per https://docs.github.com/en/actions/deployment/security-hardening-your-deployments/configuring-openid-connect-in-amazon-web-services#updating-your-github-actions-workflow
id-token: write # This is required for requesting the JWT
contents: read # This is required for actions/checkout
env:
ECR_REPO: [YOUR_ECR_REPO]
# Create role using https://aws.amazon.com/blogs/security/use-iam-roles-to-connect-github-actions-to-actions-in-aws/
AWS_ROLE: [GITHUB_ACTIONS_ROLE_ARN]
AWS_REGION: us-east-1
```
16. 更新 `docker-images` 工作流,使其 **不** 在 release 时运行
```yaml .github/workflows/docker-images.yml theme={null}
name: Build Docker Images
on: workflow_dispatch
```
17. 通过 Github Release 运行工作流
```bash Mac theme={null}
gh release create v0.2.0 --title "v0.2.0" -n ""
```
```bash Windows theme={null}
gh release create v0.2.0 --title "v0.2.0" -n ""
```
15. 使用 `GithubActionsRole` ARN 和 ECR 仓库更新工作流。
```yaml .github/workflows/ecr-images.yml theme={null}
name: Build ECR Images
on:
release:
types: [published]
permissions:
# For AWS OIDC Token access as per https://docs.github.com/en/actions/deployment/security-hardening-your-deployments/configuring-openid-connect-in-amazon-web-services#updating-your-github-actions-workflow
id-token: write # This is required for requesting the JWT
contents: read # This is required for actions/checkout
env:
ECR_REPO: [YOUR_ECR_REPO]
# Create role using https://aws.amazon.com/blogs/security/use-iam-roles-to-connect-github-actions-to-actions-in-aws/
AWS_ROLE: [GITHUB_ACTIONS_ROLE_ARN]
AWS_REGION: us-east-1
```
16. 更新 `docker-images` 工作流,使其 **不** 在 release 时运行
```yaml .github/workflows/docker-images.yml theme={null}
name: Build Docker Images
on: workflow_dispatch
```
17. 通过 Github Release 运行工作流
```bash Mac theme={null}
gh release create v0.2.0 --title "v0.2.0" -n ""
```
```bash Windows theme={null}
gh release create v0.2.0 --title "v0.2.0" -n ""
```
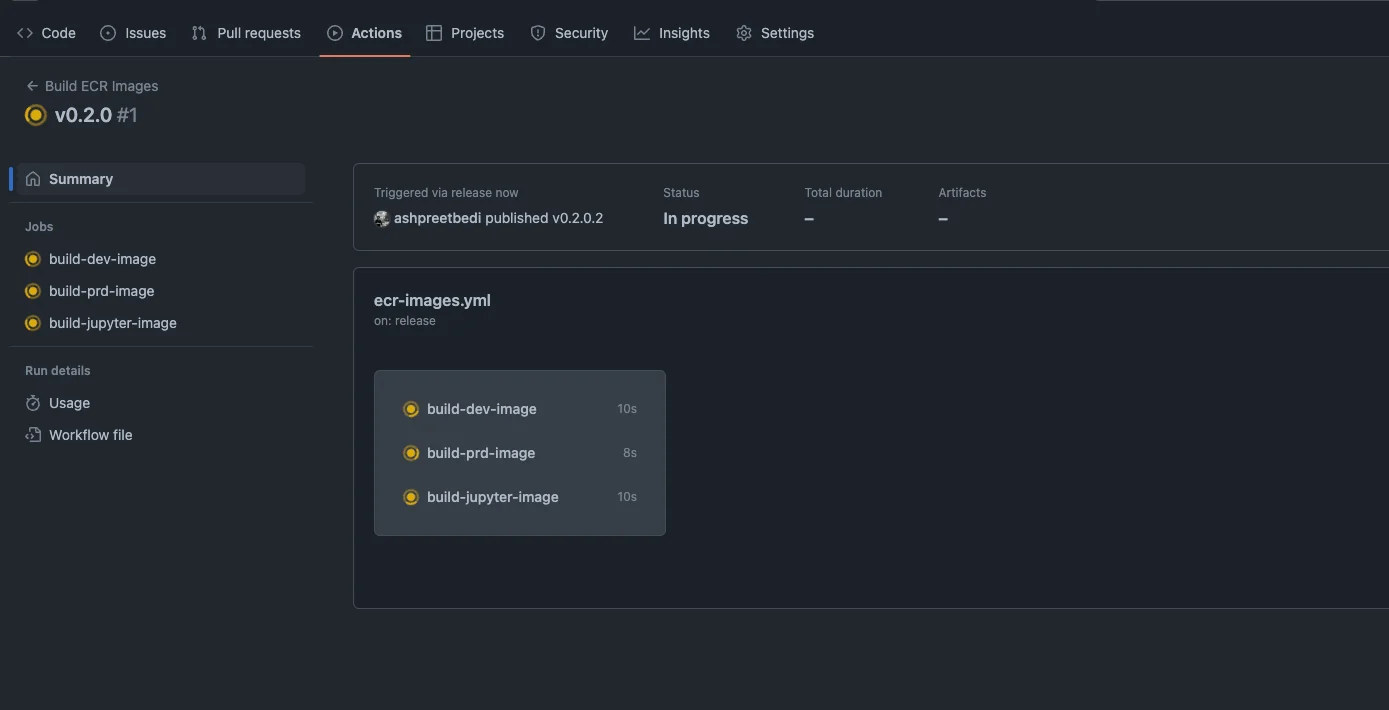 您也可以使用 `gh workflow run` 来运行工作流